How To: Install a Flashing Kit
It may seem daunting to cut a hole in your beautiful new canvas tent BUT once the flashing kit and stove is in place it will make it all worthwhile.
Here at Anevay, we all agree that having a woodburning stove in your tent completely changes the whole camping experience and it will never be the same without it. Therefore installing the flashing kit is a step you will need to master. The instructions for our flashing kits all slightly vary depending on whether you are installing your stove in a TENT or a SHED and also which stove you will be using.
This is a more general blog post about INSTALLING a flashing kit. Have a look at our other blog post if you are unsure about WHICH flashing kit you need.
We have tried to cover everything below but if you have any questions don't hesitate to contact us.

With a TENT installation:
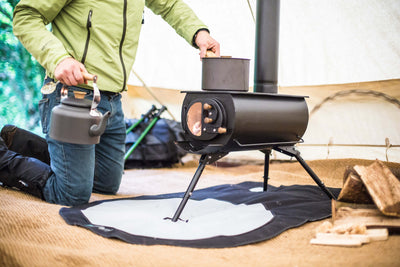
First things first: Start by setting up your tent and figuring out where you would like your stove to be. Most people like to have it set to one side of the centre pole so the flue can exit through the ceiling. If you would like it to be in the middle of your tent by the central pole you may need some extra flue sections.
REMEMBER: When positioning the stove make sure you have enough distance away from the tent wall- we recommend 600mm. We would also recommend a heat mat to keep the floor of your tent safe from any stray embers that may escape when you open the door of your stove and absolutely always a carbon monoxide alarm.

Following the instructions included, you will now need to cut your silicone to size. Make the cut in the flashing 5mm above, and parallel to, the marked line (closer to the small hole).
Be very careful, as a jagged cut can cause the silicone to split down the side rendering it unusable. If you have any concerns about this process, feel free to contact us for some guidance. Next, measure on the tent roof where you would like your stove to stand and consequently where your flue will exit. This is where the hole will be cut. Unscrew the bolts from the kit and hold one of the metal rings against the canvas and draw around the inside diameter. Next, mark on the canvas where each of the holes are located on the ring, this will be where the screws will go.
Now cut along the circle line carefully with a craft knife and make small holes in the screw marks with the knife. Now it's time to attach the flashing kit. Clamp the two rings on either side of the canvas with the silicon on the outside (as seen on the diagram below). Push the bolts through and screw into place. Now that the kit is secure, push the flue sections through the flashing kit from the inside. Your stove will now be securely in place and ready to light up. 
With a SHED installation:
**We have a more specific blog post about installing your stove in a shed so follow this link for more information...**
With a shed flashing kit you will firstly need to work out where in your shed or structure you would like your stove to go. If you have it in a corner with a corner section of heat shield behind, this will radiate the heat into the room and protect your wall from the heat.
Our stoves are very versatile and have been fitted in vans, garden sheds and houseboats and are ideal for small spaces. The heat shields just protect any nearby combustibles in these unique spaces by creating an air gap between the wall and the shield.
When you have decided where the stove will be positioned, unpack your flashing kit. You will have a box with some silicone sealant, bolts and instructions. The first thing you will need to do is make the hole in your roof. Following the instructions, mark a hole with a pen on the inside diameter of the flashing kit. Be careful about making this accurate. If too large, the silicone will not have enough room to fit to the roof securely, and if too small, the flue will not fit out or wont have enough of an air gap to cool the flue. Using a jigsaw or a grinder (depending on your roof material) cut the hole carefully following your pen marks.

Push the flue through this hole and come onto the roof of your structure with your flashing kit and the box kit. Once on the roof, squeeze the silicone sealant around the hole in the roof where the flashing kit will fit in place, and push the flashing down the pipe, as seen in the photo on the right. Push the edges of the flashing kit down firmly so it seals, and drill in the screws. Squeeze a line of more sealant over the bolts to make sure the roof is completely sealed from the elements.
Once on the roof, squeeze the silicone sealant around the roof where the flashing kit will fit in place and push the flashing down the pipe, as seen in the photo on the right. Push the edges of the flashing kit down firmly so it seals, and drill in the screws. Squeeze a line of more sealant over the bolts to make sure the roof is completely sealed from the elements.
Once again, ensure you have a carbon monoxide alarm fitted as an essential. So now you're finished and ready to fire up your stove! Put the kettle on and your feet up.
**If you have INSULATED flue sections, which is recommended in a permament structure, you will need a much larger flashing kit. Have a look at our other blog for instructions on which one will fit your flue best.**
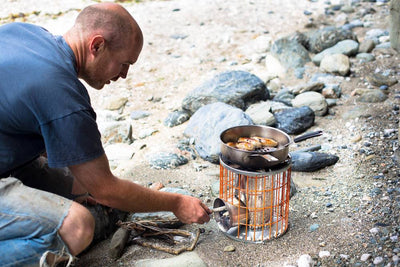
FINAL TIP: We have had many customers recently asking what to do with the flashing kit when the stove is not needed in the tent. It might be a sunny evening and you may want to cook in front of your tent or take it down to the beach. There is very little point in removing the flashing kit itself when it is not in use, so filling the silicone hole with a tennis ball solves the problem. It forms a complete seal to protect from the rain. If you would like a more elegant solution, we would suggest sewing a flap over the flashing kit and securing it with velcro.